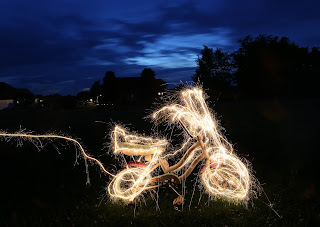
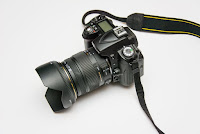
How to do light painting using DSLR
So today I want to share some tips on how to do light painting. I happened to know to do light painting from my friend during my high school. During that time, we used the Nikon d3100 which it owned by my friend. After that, i practice it using another camera. Without any further do, lets get on the topic.
So the first step to do light painting is you have to be in totally dark room or space. Then set your DSLR to manual. To do this you just have to rotate the option knob to M. Now you have full control of your camera.
Next step you need to do is set the shutter speed to about 15 seconds. Keep the ISO as low as possible maybe around 100 or 50 if your camera able to reach that value. For aperture, you can keep it around f-4 to f-5.6. But it's all depend on how much you want the painting to be in focus.
Right after you have done with the setting, you have to make sure your painting to be in focus. But how do we can be sure about it. Here is the trick. Before you shooting, turn on the light first. Set the lens to manual focus and adjust the focus until you satisfy with it. After that you can turn the light off again. Now you can press the shutter and start painting.
If you want to do more design or drawing, you can simply set the shutter speed to bulb mode. On this mode, you can have longer time to do the painting. The shutter need to be pressed from the beginning until you done your painting. It is recommended to use shutter release or the remote to avoid hand shake on the camera.
I hope those tips are useful for you. Just experimenting with it until you get the nice shot.
I think that's wrap up for this entry.
Until Next Time


Wow this article made me want to try this trick immediately. Thanks for the tips anyway
ReplyDeleteWow that's a great tips how to become master in using DSLR camera .tq
ReplyDeleteWow this tricks really help me...thanks
ReplyDeleteNice blogpost bro
ReplyDelete